In an earlier blog post, I wrote about Dataverse environments and how they are the container that stores the data, apps, processes, reports, and other components within a Dataverse solution. A Dataverse solution is the way that we package our application and all its parts into a single file that can be used for distribution or for application lifecycle management (ALM) processes. In this post I will show to how to create a new Dataverse solution. Some of the content in this post comes from an article that I wrote for AvePoint called How to Get Started With Dataverse Solutions. This post is intended to a lighter weight version of the same content.
Open Power Apps from https://make.powerapps.com and then select your target Environment.

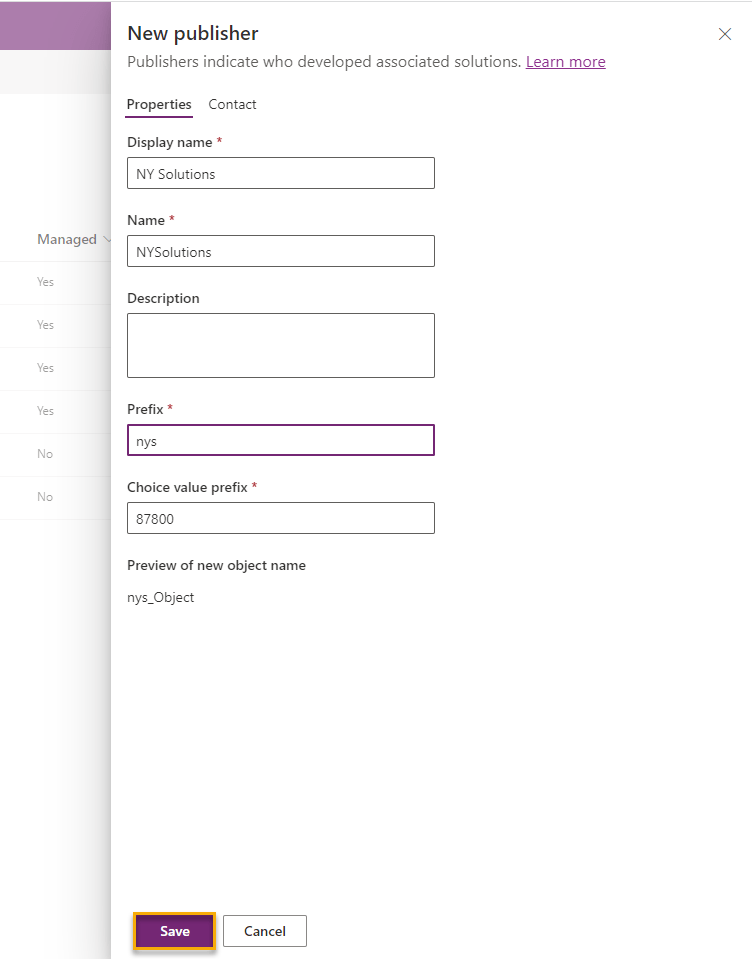
Click New solution and then click New publisher. A solution publisher shows who developed the app.

Complete the New publisher form by supplying the following information:
- Display name: This is the publisher’s name shown in the solution
- Name: This is the internal publisher’s name with no spaces or special characters
- Prefix: Gets added to all custom solutions items and will help discern delivered Dataverse items from your custom items
- Choice value prefix: This is a numeric value that gets added to all choice value internal identifiers. These become important when using Power Automate, but are not surfaced on the application front-end
- Contact: This is the default organization information
Click Save to create the new publisher and return to the solution creation screen.
Complete the New solution form by supplying the following information:
- Display name: This is the name shown in the solution
- Name: This is the internal solution name with no spaces or special characters
- Publisher: We created this during our earlier steps.
Click Create to create the new solution.

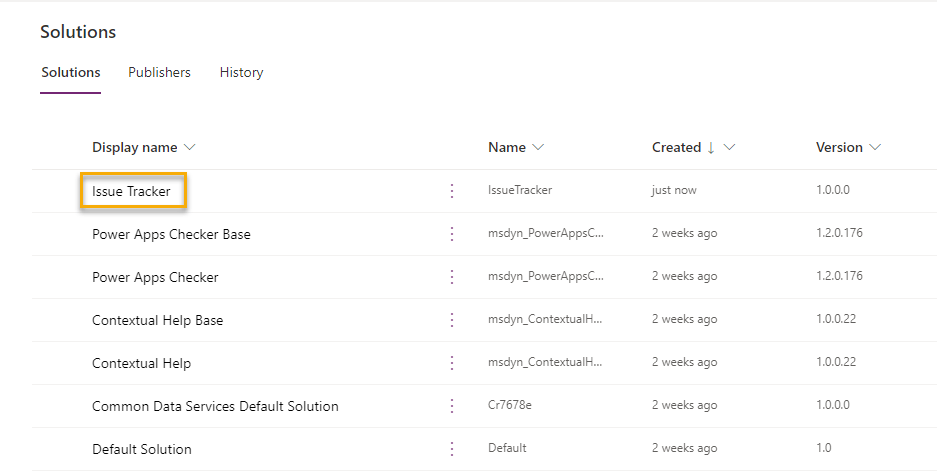
Our newly created solution is now available in the Solution listing.
Click into your solution and notice the default and new options available for us to add existing objects from the Environment or to create from new.
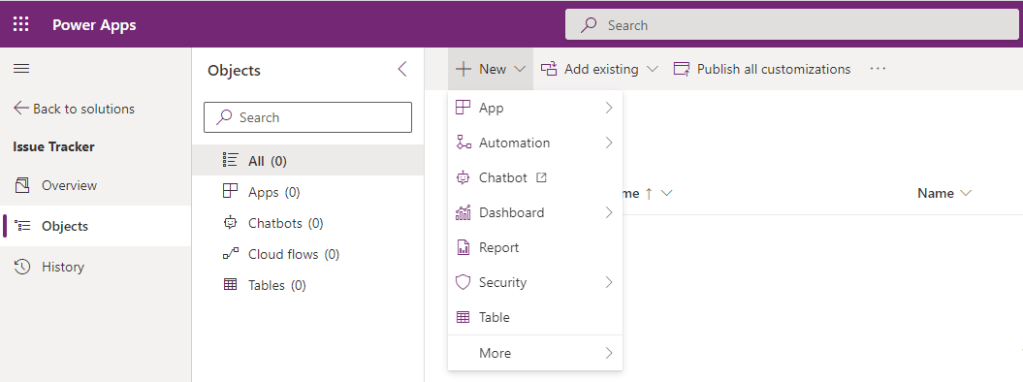
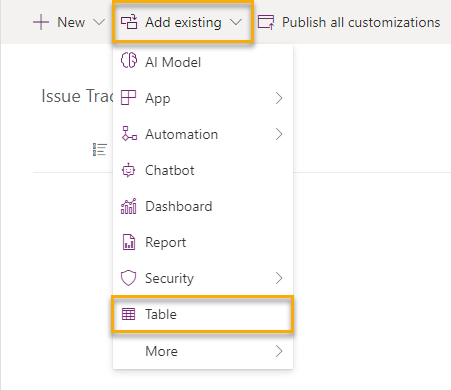
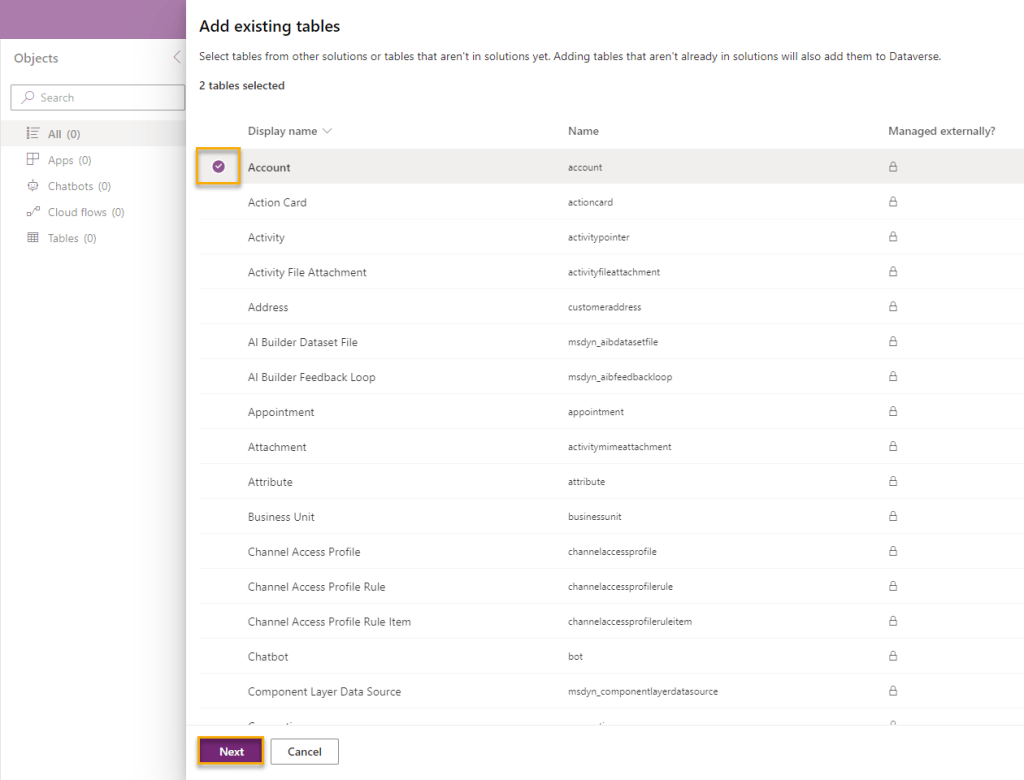
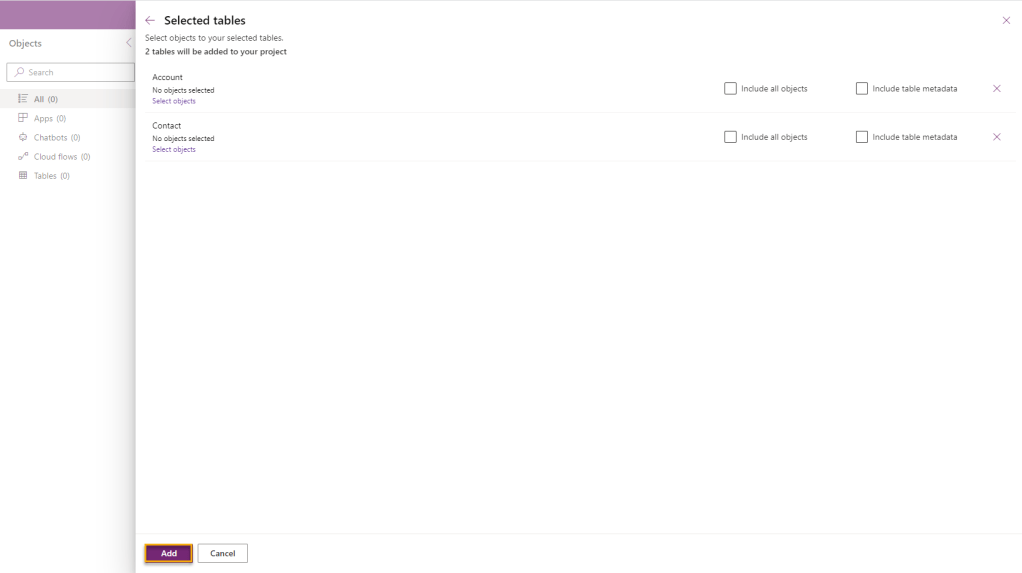
Click Add to include the existing tables into our solution.
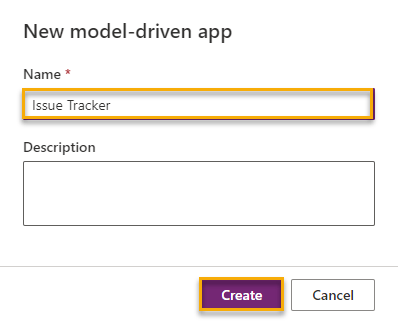
To see our tables in action we will create a Model-drive app by clicking New, select App and then click Model-driven app.

Supply a Name and then click Create.
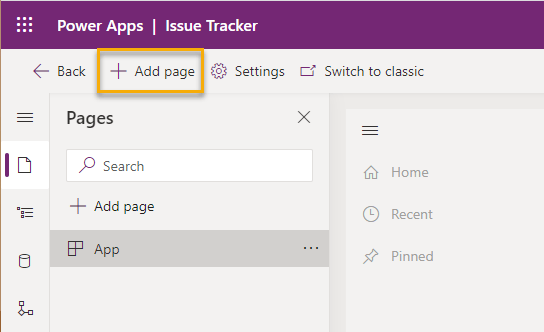
Click Add page to include the Account and Contact tables.
Select Table based view and form and then click Next.

Select Account, Contact and ensure that Show in navigation is selected and then click Add.

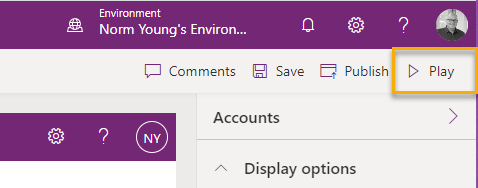
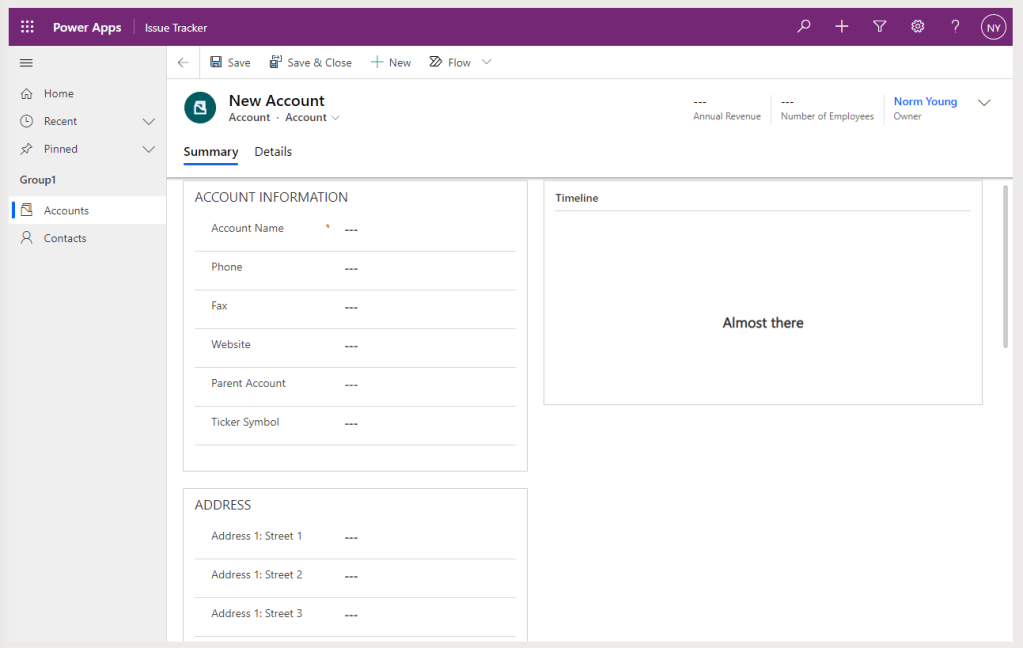
Click Play to test your Model-driven app. Click Save and continue if prompted.
If you click the Accounts entry you will see the value that Dataverse and the Common Data Model brings to citizen developers and makers alike with all of the forms, views, tables, columns and so on already created. Value is further realized if data already exists in the shared objects like the Accounts table by maintaining a single source of truth.
I am a big fan of Dataverse and Model-driven apps as they allow me to focus on data models, automations and process flows that meet my user’s needs. Solutions are core to the Dataverse story as a means of packaging solution componentry into a single, manageable and portable container.
In future blog posts we will build out our Issue Tracker solution with customized views, forms and automations. Thanks for reading!
NY
