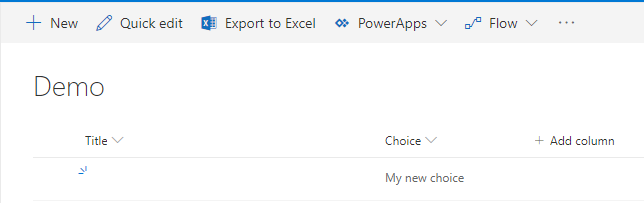
The “out of the box” SharePoint Online List experience offers excellent form and function. However, there are times when the default new/edit form must be updated. In this post I will customize the default form using PowerApps. Specifically, I will remove the “Title” entry and show how to update the default PowerApps drop-down menu to allow “Can add values manually” with a “Choice” column.
The “Title” column is default in all Lists. In this scenario, it is not required, I cannot delete it and I don’t want users to see it.
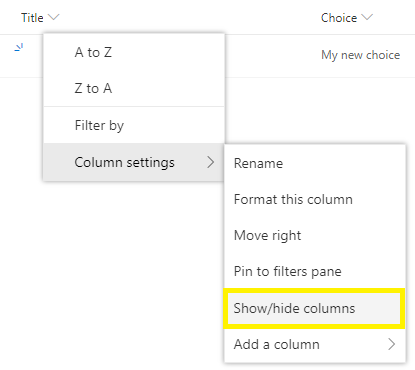
Step 1 – Hide it from the “All Items” view and make it not required.
Hide it: Click the down arrow on the “Title” column, select “Column settings” and click “Show/hide columns”.
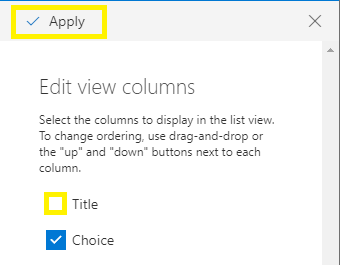
Deselect “Title” and click “Apply”.
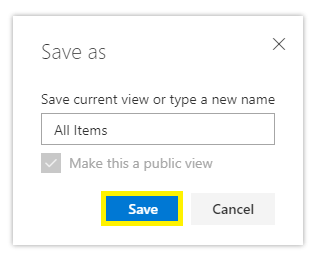
Click the “All Items” view and select “Save view as”.

Click “Save”.
Make it not required: Click “Settings” and select “List settings”.
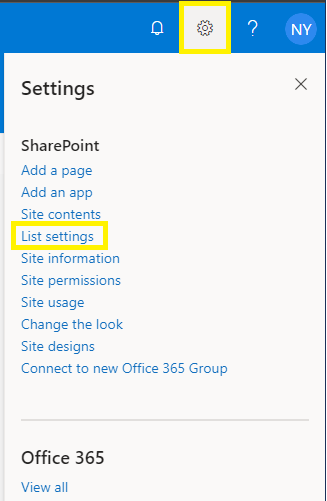
Click “Title”.
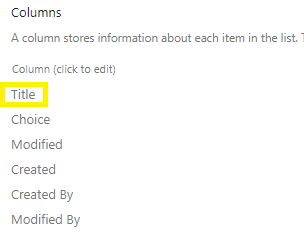
Set “Require that this column contains information” to “No”. Click “OK”.

Return back to the list.
Things look good for “Quick edit”.

Step 2 – Update the default new/edit form to remove it.
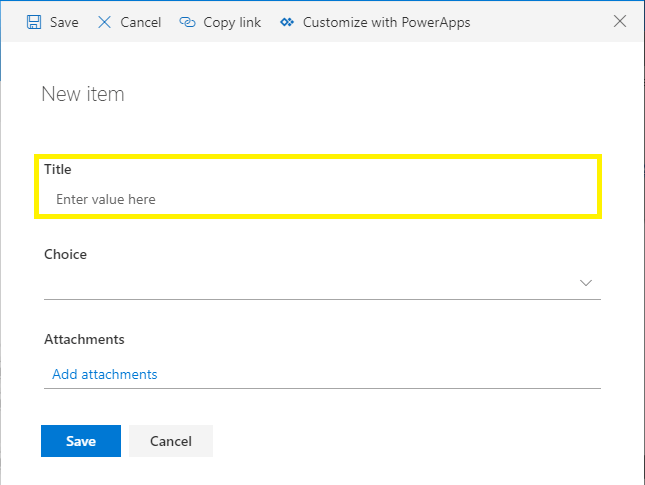
Things don’t look so good when using the default “New” and “Edit” form. Specifically, I don’t want users to see the Title column.
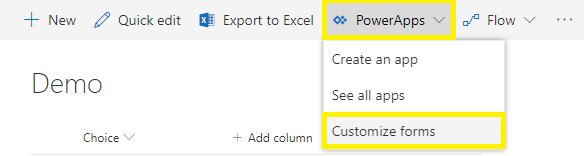
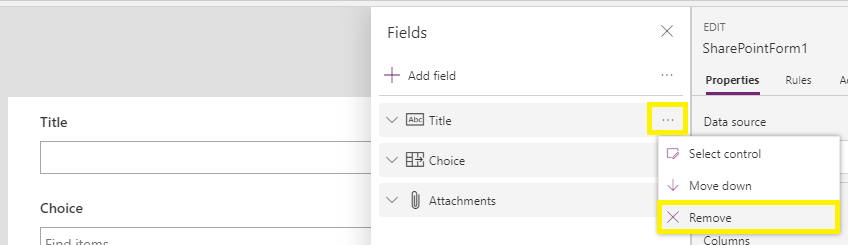
Click “PowerApps” and then click “Customize forms”.
Select the ellipse on the “Title” column and then click “Remove”.
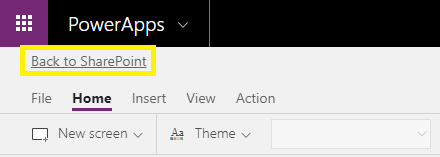
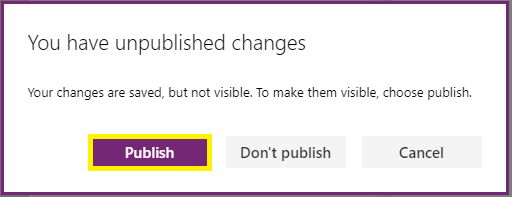
Click “Back to SharePoint” and click “Publish”.
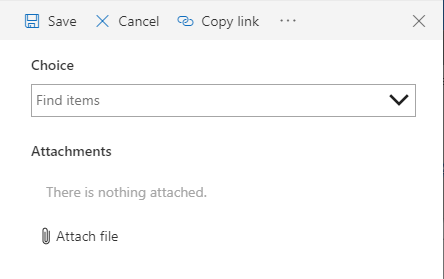
The default “New” and “Edit” form has been replaced and is looking good but there is a problem.
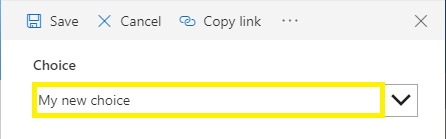
Even though my “Choice” column “Can add values manually” PowerApps does not support this feature “out of the box”.

There is no “My new choice” option after entering it and it does not save back to the list.
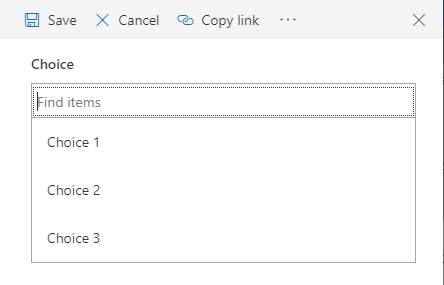
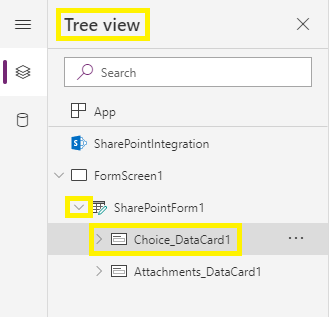
Solution – Customize with PowerApps again (click “PowerApps” and the click “Customize forms”).
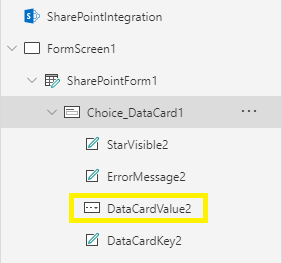
From the “Tree view”, expand “SharePointForm1” and select “Choice_DataCard1”.
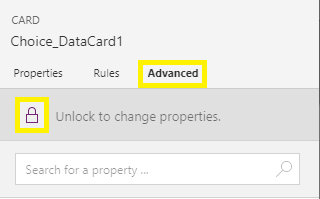
From the “CARD” menu, select “Advanced” and click “Unlock to change properties”.
Change the “Update” text to:
If(Not IsBlank(DataCardValue2.Selected),
DataCardValue2.Selected,{Value: DataCardValue2.SearchText, '@odata.type':
"#Microsoft.Azure.Connectors.SharePoint.SPListExpandedReference"})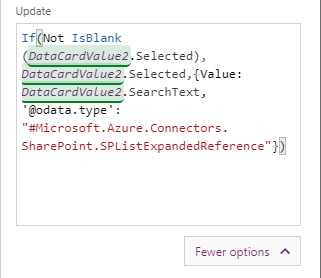
“DataCardValue2” comes from:
Click “Back to SharePoint” and click “Publish”.
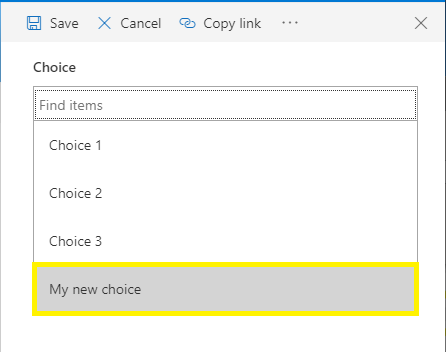
Enter new lookup values as desired and it will save.
Thanks for stopping by.
NY

Great read thank yoou
LikeLike