In my previous blog post I showed how easy it is to Use Microsoft Lists and Power Automate to provision Microsoft Teams. In this blog post I will show how to extend the previous solution to include the creation of a Microsoft Teams Private Channel. At the time of writing there is no create Private channel action in Power Automate. This means we have to leverage the Graph API. I found creating the Graph API Connector complicated but it’s worth doing for all of the options that Graph brings to Power Automate.
There are three parts to this solution that range from easy to complex, at least in my experience:
- Create Graph API connection (complex)
- Update “Projects” list (easy)
- Create new Power Automate Flow (moderate)
Part 1 – Create Graph API Connector
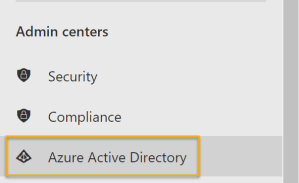
From the Microsoft 365 admin center, open “Azure Active Directory”.
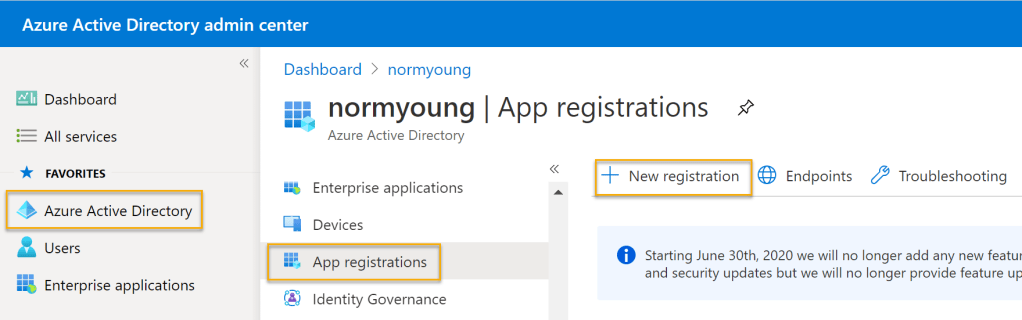
Create a new app registration by selecting “Azure Active Directory”, “App registrations” and then “New registration”.
Enter an application “Name” i.e. Graph API; set “Supported account types” to “Single tenant”, leave the “Redirect URI” blank and click “Register”.

Important: Save the “Application (client) ID” and the “Directory (tenant) ID” for later use in Power Automate.

Click “API permissions”, click “Add a permission” and then click “Microsoft Graph”.

Select “Application permissions”.

Search for and apply the following permissions:
| Permission | Admin consent required |
| Group.Read.All | Yes |
| Group.ReadWrite.All | Yes |
| GroupMember.ReadWrite.All | Yes |
| User.Read | No |
| User.Read.All | Yes |
| User.ReadWrite.All | Yes |
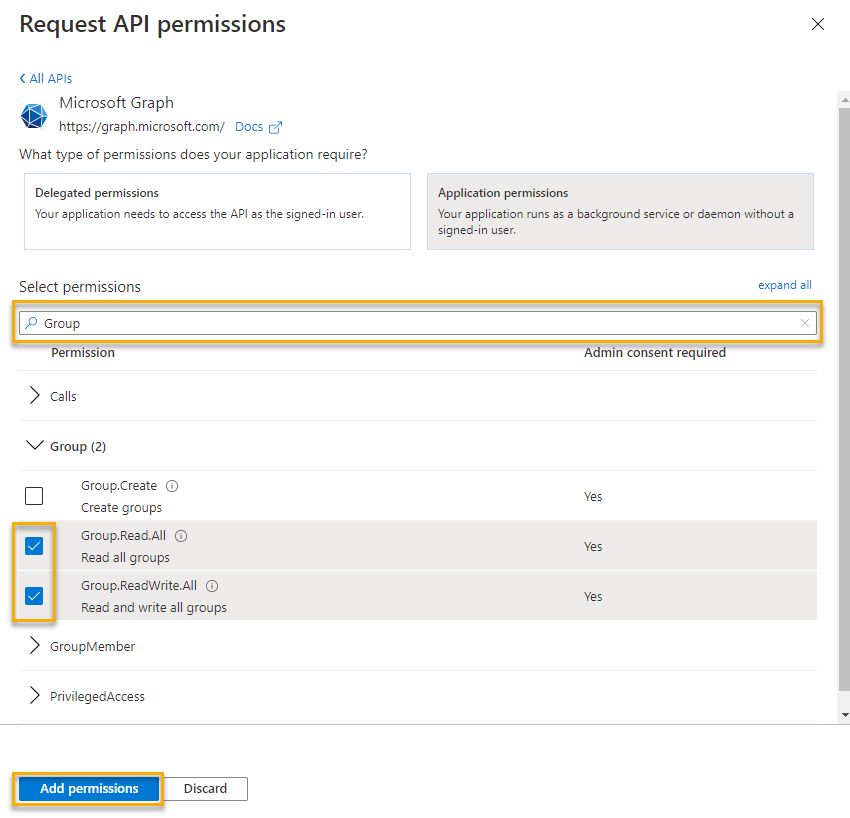
Click “Grant admin consent” and then “Yes” when prompted.

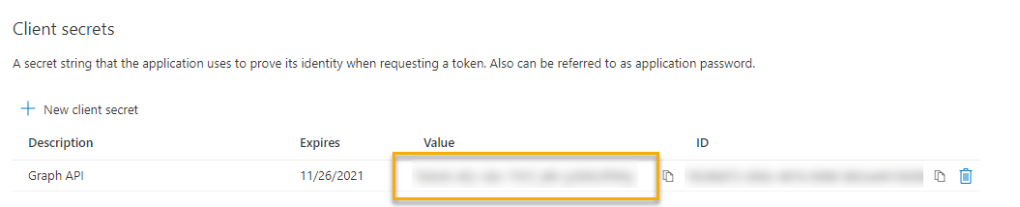
Click “Certificates & secrets” and then click “New client secret”.
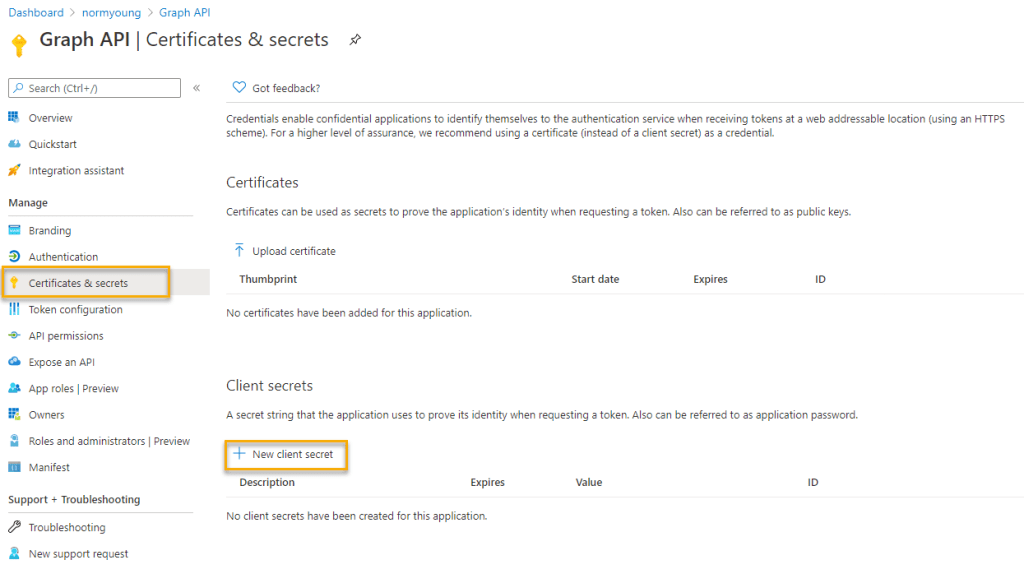
Provide a “Description” i.e. Graph API, select an expiration date and then click “Add”.

Important: Save the client secret “Value” for later use in Power Automate. You will not be able to retrieve this value later!
Part 2 – Update “Projects” list
I’ve added a new Person column, called “Private Channel Owner” to the “Projects” list.

| Column name | Column type |
| Title | Title used to store the project name. |
| Description | Single line of text used to store the project description. |
| Visibility | Choice with the following options: “Private” and “Public”. Indicates if a team should visible to non-team members. |
| Owners | Person or Group with Allow multiple selections enabled. |
| Members | Person or Group with Allow multiple selections enabled. |
| Link | URL used to store the web link to the newly created Teams team. |
| Private Channel Owner | Person. Important: do not allow multiple selections. We can only add one owner to the private channel using Graph. |
Part 3 – Create new Power Automate Flow
Create a new Flow from the Projects list > Automate > Power Automate > See your Flows > Create new > Automated from blank. Provide a Flow name, i.e. “Teams provisioning with private channel”, select the SharePoint “When an item is created” trigger and click “Create”.

Set the “Site Address” and “List Name” to your target site and list.

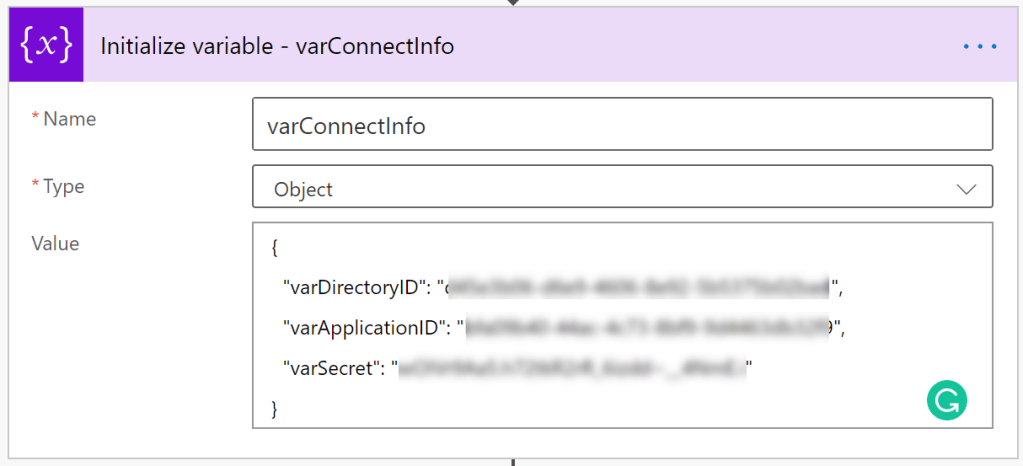
Create a new “Initialize variable” action. Set “Name” to “varConnectInfo”, “Type” to “Object” and “Value” to:
{
"varDirectoryID": "<Enter your Directory ID>",
"varApplicationID": "<Enter your Application ID>",
"varSecret": "<Enter your Client Secret Value>"
}
Create a new “Compose” action. Set “Inputs” to variable “varConnectInfo”.

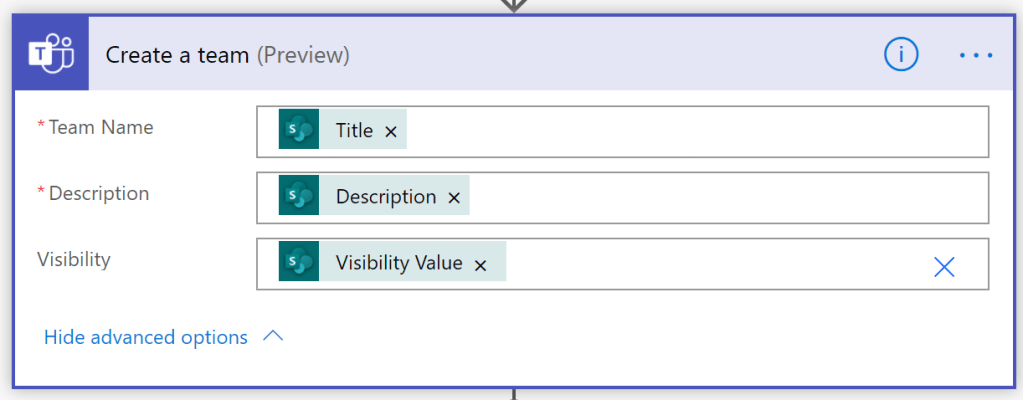
Insert a new Microsoft Teams “Create a team” step. Set:
- “Team Name” to “Title”
- “Description” to “Description”
- “Visibility” to “Visibility Value”
Add a new “Condition” step to confirm the successful creation of the Teams team. Set:
- “Choose a value” to “New Team Id” from the “Create a team” step
- Condition to “is not equal to”
- “Choose a value” to expression “NULL”

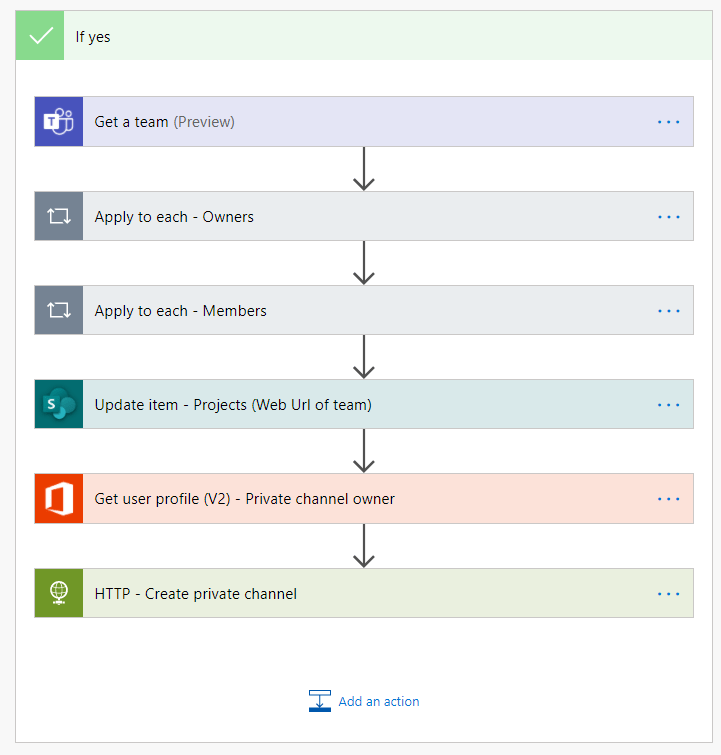
In the “If yes” branch insert a new Microsoft Teams “Get a team” step. Set “Team” to “New Team ID” from the Create a team action.

Insert a new Microsoft Teams “Add a member to a team” step – this is for Owners. Set:
- “Team” to “Team ID” from the Get a team step
- “A user AAD ID for the user to add to a team” to “Owners Email”
- “Should the newly added user be an owner of the” to “Yes”

Power Automate will place the “Add a member to a team” step into a “Apply to each” loop because the “Owners” column can store multiple selections.
Insert another new Microsoft Teams “Add a member to a team” step – this is for Members. Set:
- “Team” to “Team ID” from the Get a team step
- “A AAD ID for the user to add to a team” to “Members Email”
- “Should the newly added user be an owner of the” to “No”

Insert a new SharePoint “Update item” step.
- “Site Address” and “List Name” to your target site and list
- “Id” to “ID” from the “When an item is created” step
- “Title” to “Title” from the “When an item is created” step
- “Visibility Value” to “Visibility Value” from the “When an item is created” step
- “Link” to “Web Url of team” from the “Get a team” step

Add a new Office 365 Users “Get user profile (V2)” action. Set “User (UPN)” to “Private Channel Owner Email” from the create item step. The output from this step is used during the Graph API call.

Now for the cool stuff! Add a new “HTTP” action to create the private channel. Set:
- “Method” to “POST”
- “URI” to “https://graph.microsoft.com/v1.0/teams/<Team ID>/channels”; where “Team ID” comes from the “Get a team” action.
- “Body” to:
{
   "membershipType": "private",
   "displayName": "Private",
   "description": "This channel is private",
   "members": [
     {
       "@odata.type": "#microsoft.graph.aadUserConversationMember",
       "user@odata.bind": "https://graph.microsoft.com/beta/users('<Id>')",
       "roles": [
         "owner"
       ]
     }
   ]
 }

Where <Id> comes from the "Get user profile (V2)" action
- “Authentication” to “Active Directory OAuth”.
- “Tenant” to expression: variables(‘varConnectInfo’)?[‘varDirectoryID’]
- “Audience” to “https://graph.microsoft.com”
- “Client ID” to variables(‘varConnectInfo’)?[‘varApplicationID’]
- “Credential Type” to “Secret”
- “Secret” to variables(‘varConnectInfo’)?[‘varSecret’]

My completed Flow looks like the image below.

And my completed “If yes” branch looks like the image below.
Test by creating a new row in the Projects list.

If all goes well your Flow will execute without errors and a new Teams team with a Private Channel will be created!

I know this is a long post for something that can be done manually but at scale for centralized deployment and management this is a great way to provision Teams for projects, committees and other types of working groups where control and consistency is key. Additional value comes in the form of gaining access to the Graph API for further actions in Power Automate.
Thanks for reading.
NY

Reblogged this on El Bruno.
LikeLike